Sunday, December 30, 2012

Knitting the Knitter's Almanac - May

At this point, it is clear that I will not be finishing the projects in the Knitter's Almanac in a single year, but I'm happy to say that I have at least made it though half of the year, and will continue this project into 2013 to its completion.  I clearly do not knit as much as Elizabeth Zimmermann, but since I do have other things to occupy my time (some more worthy than others) I'm not too upset with only making it halfway.

May's project is mittens.  It seems a little odd to be knitting mittens in the spring, but Ms. Zimmermann notes that this way you are not rushed to finish them as you might be at the end of the year.  Since I was not knitting mine for anyone in particular, I wasn't rushed, even though I started them in November.  It was somewhat unclear how many mittens I should knit to consider this chapter complete.  The text discusses various techniques and talks about knitting three mittens for children, since they are so easy to lose, but there are only two patterns at the end of the chapter, so in the end I knit these patterns, incorporating the techniques discussed into both.


Norwegian Mittens
Close up of cuff
Close up of color work snowflakes
The first pair of mittens I knit were the Norwegian Mittens.  The back has a snow flake pattern in two colors, and the palm has a simple checked pattern.  I decided to use my hand spun, hand dyed yarn for these.  The mittens have a very long cuff, meant to go over the coat sleeve, and they look huge when off your hands, but they fit quite nicely once on.  I knit these pretty much as written, though I modified the color work slightly.  The thumb of these comes off the palm, and it uses what Ms. Zimmermann calls the "Thumb Trick", basically scrap wool is knit in to the area where you wish the thumb to be, then the rest of the mitten is knit, and when finished, the scrap yarn is removed, stitches are picked up and the thumb is knit.  It creates a seamless join for the thumb.  I've used this technique before for sleeves as well.  Since I was working with a limited supply of irreplaceable yarn, I had to be careful how much of each color I used on the first mitten to be sure I would have enough for the second.  I ended up using most of the green and undyed yarn, but with plenty of the red left over.

The second pair of mittens I knit were the Mitered Mittens.  The idea behind the Mitered Mittens was to increase and decrease evenly around to create a zig-zag or chevron pattern in the knitting.  It looks good knit in a single color, but when additional colors are added, the shaping really shows up.  I decided to continue using the red dyed homespun, and used undyed yarn, first my own hand spun, and then yarn I had left over from January's project, as the contrasting color.  For these mittens, I decided to use two of EZ's suggested techniques for mittens. 


Idiot Cord Border
The first was what she calls the "Idiot Cord Border".  Stockinette stitching, the most common form of knitted work, has a tendency to curl in on itself both vertically and horizontally.  To counteract this, an edge must be worked in a different type of stitch.  In the first pair of mittens, I used a ribbed stitch, as suggested in the pattern.  Many of the previous knit projects have used garter stitch as the edging.  The Idiot Cord Border is another technique that can be used to counteract the curling.  Idiot Cord, or I-cord, is basically a thin knit tube.  The border technique is to make the cord with as many rows as you would cast on stitches, then pick up a stitch per row and start knitting. 


Mitered Mittens
The second technique I incorporated into these mittens was to put the thumb out from the side rather than the palm.  EZ suggests doing this so that the mittens can all be knit the same way, instead of mirrored, as I needed to do for the Norwegian Mittens.  As she points out, once you wear the mittens, they mold to your hand and become right handed and left handed mittens, even if you don't knit them that way.  This is why she can knit them in sets of three as noted above.  Personally, I'm not in love with the aesthetic result of joining the thumb from the side on the mitered mitten, since the thumb comes out of one of points in the shaping pattern, but I'm not sure it would have looked better elsewhere either, and I did want to incorporate as many of the suggested techniques in the two pairs of mittens as possible. 

Mittens were pretty quick and easy projects, and great for using up yarn on hand instead of buying (and running out of) more.  In fact, my only complaint with mittens was that I had to knit two of them. Having to do the same project twice in a row is somewhat tedious to someone like me who is constantly looking for something new and different to do. Fortunately, the small size makes it somewhat easier to bear, though I may have to learn how to knit two at once, a technique employed by many sock knitters, if I decide to knit more mittens. 

As a final note, this is the first Almanac chapter for which I did not run out of yarn, so hopefully I'm starting a new trend in yarn usage. 

Monday, December 24, 2012

Knitting the Knitter's Almanac - April

I know, I know, it's December and I'm posting about the April project from the Knitter's Almanac.  Clearly, I'm not making it through the book in only one year. . .

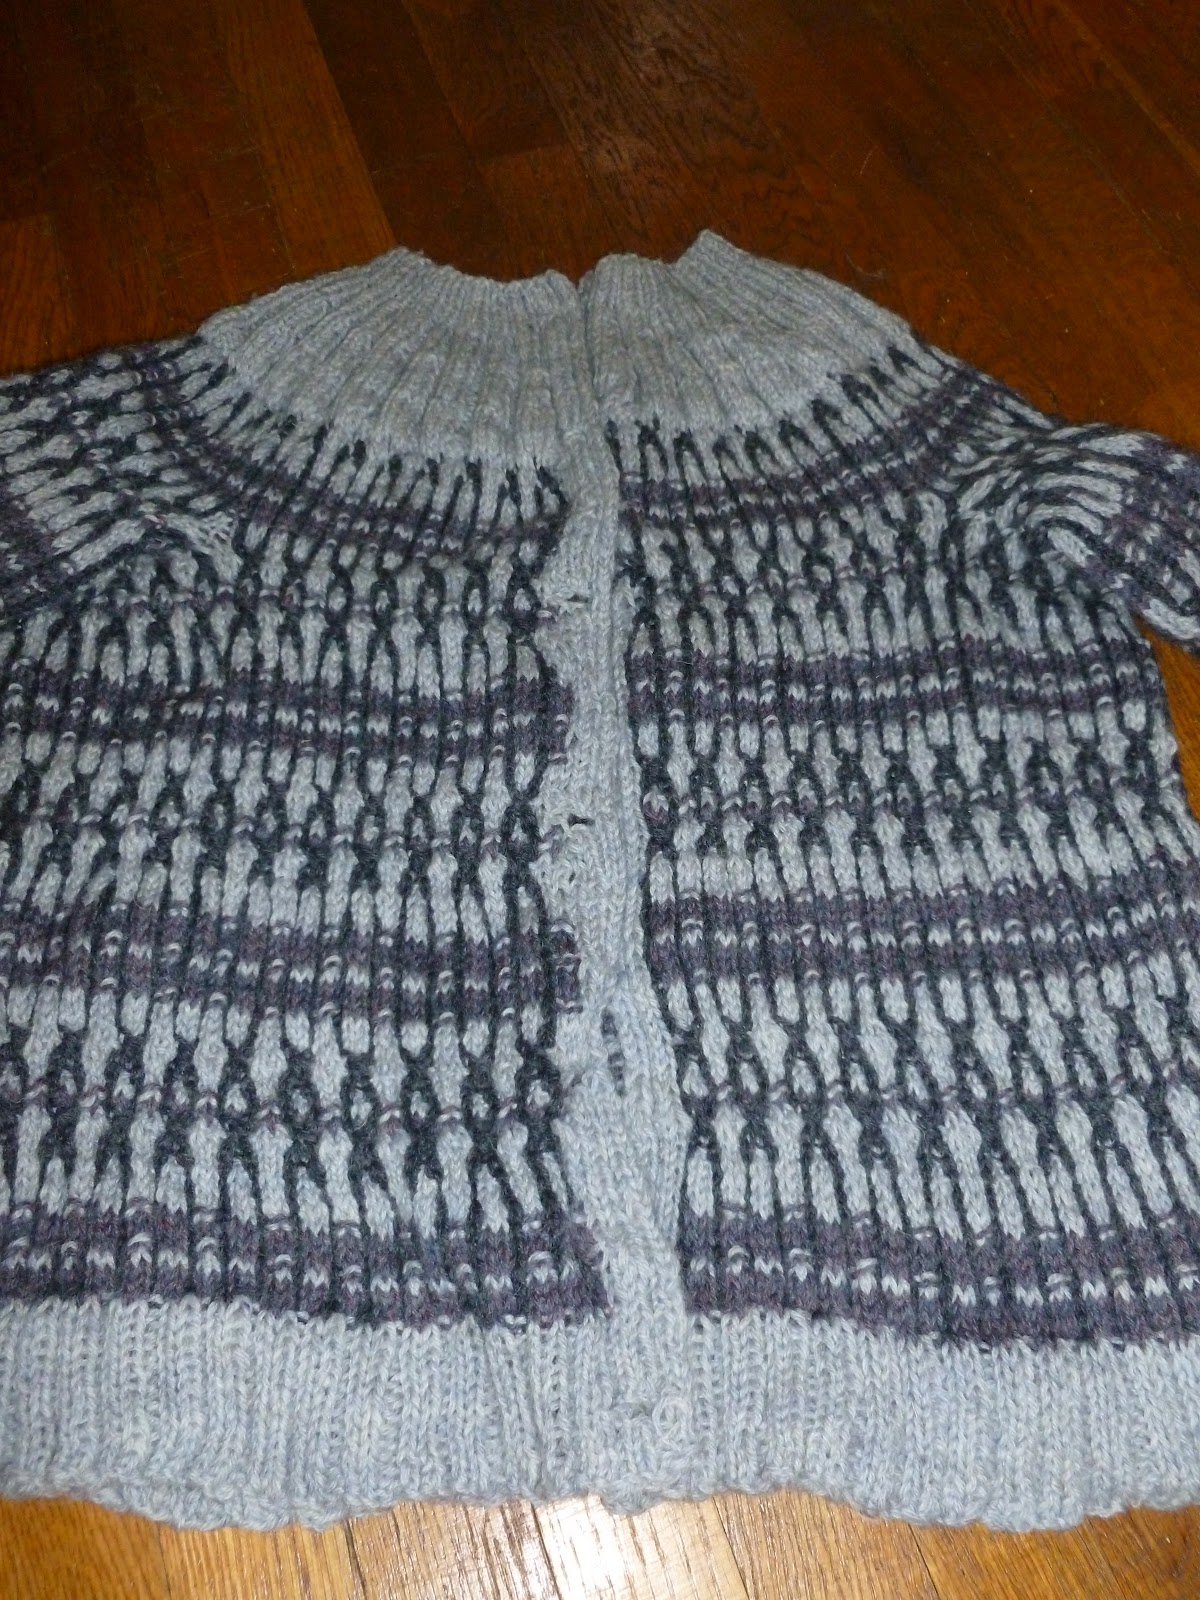
April's project is an afghan, specifically designed to mask it's construction techniques, which I'm going to reveal here anyway.  The design is similar to the "Granny Square" assembly popular with old fashioned (and newer designs as well I suppose) crocheted afghans and blankets.  Basically a number of identical or similar squares are made, joined and a border worked.  This type of blanket is not my favorite in crochet, and it has the same drawbacks when knit.  Knitting the squares is quick, easy and enjoyable, though making them the same can sometimes pose a problem.  However, after you have enough squares, these must be joined, a tedious project, and then a myriad of ends must be woven in to finish the problem.  Think about it, assuming you can knit a square with one skein, or a portion of one skein, of yarn, you have two ends (the start and stop) for each square.  Some of these ends can be worked in while working the project; for example, I always knit or crochet in my start end by knitting with the regular yarn and the end until the end is used up.  And you can use the other end for part or all of the joining work, if you've left a long enough tail, but there will inevitably be ends that can't be worked in this way, that will have to be woven in after, a task I hate doing and which delays my final completion of many projects.

For this blanket, I purchased ten skeins of a recycled wool (which I partly chose because of its cost per linear yard), and vowed that I would make the blanket so I did not have to purchase additional yarn.  Initially I had hoped to be able to knit 54 squares to create a 6x9 ratio, however, it quickly became apparent that I was not getting 5.4 squares out of a single skein of yarn, and knowing that I would need additional yarn for connecting the squares and making the border, I decreased my square goal to 48, for a 6x8 ratio.  At first I joined the squares as I went, but it became clear that I would actually conserve yarn if I did all the weaving at the end, so I stopped doing that after only nine squares were joined.

The squares are knit in a pretty simple manner, they are worked in the round from the inside out with 4 evenly spaced increases to create a square.  This is the same basic pattern as the baby blanket from February.  When knitting from the center out, you must start with a very small number of stitches which cannot be worked on a circular needle, but must be worked on four smaller straight needles, called double pointed needles or dpn for short.  While I have worked with dpn before, usually it has been at the other end of the project, namely as I worked inward from the outside, decreasing instead of increasing.  Since in that direction you have the entire weight of an almost finished project, it is somewhat easier to manipulate and use the needles.  Dropped stitches, a common problem with dpn, since they do not have any stops on the ends, can be seen and picked up easily.  However, when starting a project this way, dropped stitches are harder to identify and reclaim, and it's ends up being easier to just pull everything off and start over.  Additionally, because you're just starting the pattern, it's much easier for the needles to get twisted and you end up knitting some weird formation instead of the circle you were aiming for.  I had all of these problems with the first few squares, but 48 squares means a lot of practice.  I feel I'm practically an expert at starting projects on dpn at this point.  Once I worked out the kinks of working with dpn, the squares were pretty easy mindless work, though I did have to make sure the row count was accurate so the squares came out uniform in size.


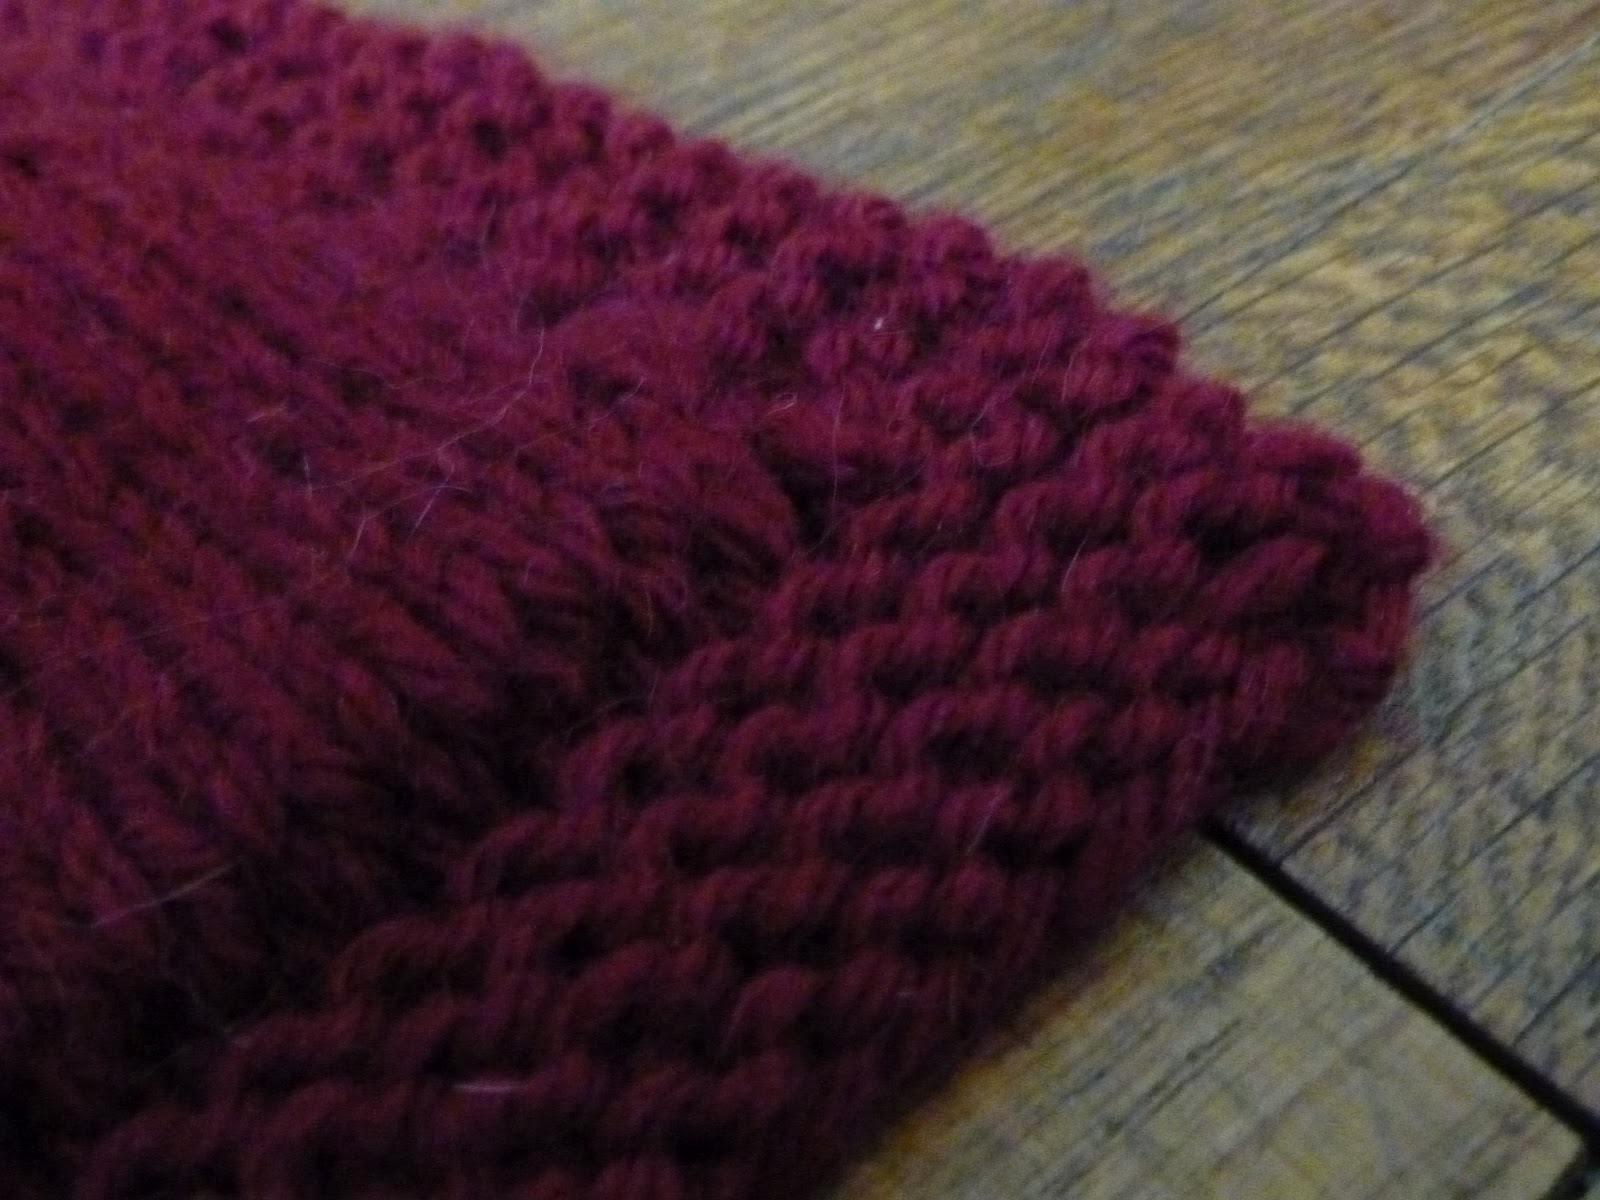
Early attempt at weaving -
note the raised area to the right side
not particularly invisible
Later weaving -
much more difficult to see the join
Once all the squares were finished, I faced the daunting task of joining them.  For this Ms. Zimmermann suggests weaving, a technique I learned back in February, but had not perfected.  Again, after 82 woven joins, I'm practically an expert now.  The advantage of weaving, and the reason EZ suggests it, is that it looks like knitting.  Since one of the reasons for the design of this blanket was to fool the eye, the weaving makes it difficult to tell that the seams are such, so it's not clear where one square ends and the next begins.  You can see the progress in my weaving ability by comparing my earlier woven joins with later ones. 


Close up of a portion of the blanket
showing the larger square, the joins
and the smaller corner squares.
To further fool the eye, the corner five stitches of each square are not joined by weaving, instead they are picked up along with the three neighboring squares' corners and knit together in a miniature square.  This was useful because I was able to pick up all the ends from the weaving and work them into the project, but knitting with four tiny strands and a main strand of yarn wasn't particularly easy or enjoyable.  I found I liked the weaving much more than knitting these tiny squares.  Once I had worked and joined the squares, it was time for the border.  Unfortunately, despite my best laid plans I ran out of yarn.  I swear I'm cursed.  So more had to be purchased to do the border, a plain garter stitch one, but with an interesting method of mitering the corners, that I can see myself using again.  After all the work was done, I faced the dreaded task mentioned above of weaving in ends.  This project has actually been done for a month except for that final step.  I knitted several other things (moving on to May and June) before I finally told myself I could not start a new project until I finished this one.

I'd like to say that after dreading the task, it was far easier than I feared, something I find happens a lot with things one dreads to tackle.  But no, it took me several hours to weave in all those ends and create a finished blanket.  However, all that weaving practice earlier paid off.  In addition to getting good at joining using weaving, the process helped me to fully understand the path the yarn takes when knit, making weaving in the ends far easier, and hopefully more secure.


Finished blanket, very large.
The finished piece is very large and I think it is quite attractive.  I've seen some examples on line where people knit the squares in multiple colors or left over yarn, and I think this construction looks good pretty much every way it's been done.  I could see myself doing a blanket like this again, though maybe not quite so large, though I'll admit, the thought of all those ends to weave might well discourage me.

Tuesday, October 9, 2012

Spinning

My homespun and crock pot dyed yarn.
Back in June I took a four week spinning class, no not at the gym, but at a yarn store.  The class taught both drop spindle and wheel spinning and the history and techniques for turning fiber into yarn. 

I've always wanted to learn to spin, especially given my fondness for high-end, natural yarns, and my personal proclivity for self-sufficiency skills, but was afraid it would be a difficult and expensive hobby to pick up.  I found out in the class that it was not really either of those things. 

The class started with how to prepare a wool fleece for spinning and an introduction to the drop spindle, probably the earliest form of spinning.  Maybe because it was my first attempt, or simply the primitive nature of the method, but the yarn I spun on the drop spindle was somewhat bulky and uneven.  Still, it was distinguishable as yarn, so not too bad.  The class lent us the tools we would need and gave us enough fiber to practice what we had learned over the week.  I ended up using all of the first week's fiber in one day!  You might say I enjoyed it. 

From there we progressed to the spinning wheel.  The shop sells wheels, so we were able to test a variety of modern wheels to determine which we liked best.  I ended up borrowing an Ashford wheel for the next three weeks.  Once the basics of pedaling the wheel and feeding the fiber were mastered, spinning was a pretty easy and relaxing activity.  Despite the contraption required and all the adjustments and parts to fidget with in order to get the wheel working right, I found wheel spinning to be far easier than spinning on the drop spindle.  I guess that's why the wheel was invented and became so popular. . .

After learning to spin single strands in the second week, we learned how to ply multiple strands together to make yarn in the third.  Since I kept using up my weekly allotment of fiber, I purchased more to keep practicing.  Having now made a few skeins of homespun yarn, I decided to try another new craft, and dye the yarn. 

I had read on line about dying yarn in a crock pot using food-grade dyes, and thought my homespun yarn would be a perfect opportunity to try this out.  It turned out to be a no-fuss way to color yarn, and I ended up dying two separate batches in different colors.

In the first three classes we were spinning wool, but in the final class we tested a variety of different types of fiber, both natural and synthetic to learn their unique characteristics and traits.  We created small sample skeins of the fibers we tried to keep as a record and reference.

I really enjoyed the class, and am pleased to add a new skill to my repertoire.  Once I'm finished with my Almanac project and have saved the money to buy my own wheel, I'd like to do a "Sheep to Shawl" type project. My research indicates that spinning your own yarn is not particularly thrifty. The fiber needed frequently costs about as much as some of the more inexpensive yarns; and once you factor in the extra time it would take to spin, it really doesn't seem cost effective.  As with most craft things, the cost to make it yourself can't compete with the cost of mass-produced items.  Of course, spinning my own yarn means I can create custom articles perfectly tailored to their recipients that have value far beyond anything mass produced, plus I have the enjoyment of the creative process and the pride of being able say "I made that".

Friday, August 3, 2012

Knitting the Knitter's Almanac - March

I wasn't idle for three months while I waited for yarn to complete February's projects.  Instead, I started and finished March's project in the interim.  March's project is a sweater in three colors.  The pattern is a combination of the color work of Fair Isle knits with the flowing lines of Aran designs to create a trellis type motif.  It's a fairly easy pattern, but of course knitting a large sweater takes time. 


Chainmail Hat
As usual, we started with a hat to get a sense of our individual gauge and to practice the pattern.  My hat came out a little snug for my head, and I'm not as pleased with the tapering at the top as my last hat, but it looks fine nonetheless. 

Ms. Zimmermann starts the chapter with a discussion of how much yarn to buy, clearly an area I've been having trouble with.  I'd like to pretend that I managed to purchase the right amount of yarn this time around, but that would be untrue.  I did realize I had purchased too little before I started knitting though, so I went back and got more.  And I'm happy to report that I had enough to finish the project after that.


Chainmail Sweater

For the sweater, I decided to make some adjustments to the pattern as written.  To begin with, EZ's instructions for the sweater were the same as January's Aran sweater - a large tube with tapered tube sleeves stitched in.  I thought that it would be interesting and educational to use her formula-based baby sweater pattern from February to knit an adult sweater.  So I do the necessary math to create a cardigan sweater using the chainmail motif.  I then adjusted the motif pattern slightly to reflect the ratios of yarn I had purchased to be sure I was using it evenly and wouldn't run out of one color too soon.  After my initial design work I set to knitting (and knitting and knitting - sweaters take forever!).  I knit til I ran out of the darkest color wool I was using for the vertical lines, then finished the bottom ribbing and cast off.  The sweater turned out to be just the right size and I had very little of the other two colors of wool left over, so all around a success in wool purchasing (at least by my standards).


Close up of color change
One other technique introduced in this chapter was a color blending technique using purl stitches on the first row with a new color.  The result is a more gradual color change than simply knitting the row as usual.  It's rather hard to describe, but if you look at the close up, you can see that where the two colors join with knit stitches there's a jagged edge, but where they are joined with purl stitches, there's a raised bump of the old color in the field of the new color.  Close up it's not particularly attractive, but from afar, the color change looks more blended and less sharp.

I feel like there were fewer new techniques and lessons in this chapter than the two previous ones, but I still gained a lot from knitting this sweater.  I'm looking forward to the next few months of practice and improvement.

Thursday, July 26, 2012

Knitting the Knitter's Almanac - February

It's July and I've only just finished up the Knitter's Almanac February projects.  To be fair, I've been done most of the projects since April, but (surprise!) I ran out of yarn before finishing everything.  Since the yarn I wanted was on back order until July, I had to wait until it came in before I could complete the last project.

February's chapter is dedicated to baby things, so there are a number of small projects:  A blanket, a sweater, leggings and a shawl.  Each features a different technique, and I learned a number of new things in the process.

Double Knitting Potholder
First up was the blanket featuring a new-to-me technique called double knitting.  Basically, you are knitting two sides of a bag at once.  When the two sides are joined on all sides, you get a very cushy blanket.  The whole time I was knitting it, I would frequently stop to appreciate how squishy it was.  I also made anyone interested in my knitting touch the squishy.  To get a handle on the new technique, Ms. Zimmermann suggests making a potholder first, just a very small square using the technique. 


Double Knitting Blanket
Edge detail - note the poofiness of
the main portion of the blanket
Successful potholder under my belt, I proceeded to the blanket.  I said I wasn't going to order more yarn I was just going to knit up what I had purchased for the project and be done with it, but it really was too small to be useful once I'd used up the yarn, so I bought another skein to make it just a bit larger.  The result is a small but useful-sized baby blanket or tummy time mat and a new technique mastered.


Baby Sweater
Next up was a baby sweater.  In this chapter EZ introduces us to her sweater formula explaining how to make a sweater in any size using percentages.  Her pattern is knit all in one piece and the only finishing seams necessary are the underarm seams.  It occurs to me that even these seams could be eliminated, but I have not yet tested this theory.  Anyway, the sweater knit up quickly, but it used all of the yarn I had purchased for the sweater and the matching leggings, causing the next project, the leggings to be put on hold.

Shawl pattern - more a blanket
I then proceeded to the shawl pattern.  The shawl pattern is knit starting from the center and increasing every other round at four equal points to make a square.  The original pattern is stocking stitch throughout, but EZ suggests that a lace pattern could be incorporated in each of the quarters, which I did.  I found a simple lace pattern I liked and added it as space became available.  In the end, the yarn I had purchased was much too bulky to really make a shawl, so I would call the end result another blanket.  But the techniques learned to make a square piece from the inside out and how to introduce lace patterns will prove useful in the future.

As I mentioned, I had planned to make the leggings and sweater to match, but used up all of the yarn I purchased for both projects on the sweater.  By the time I realized I would need more yarn, the yarn was back ordered and I couldn't get it until July.  Since I knew that would also mean a different dye lot, I decided to go with a different color altogether.  Unfortunately the other colors I thought would look good with the sweater's grey, were also all backlogged, so I had no choice but to wait.  When the yarn finally came in, I started the leggings pattern.  This was my first attempt at knitting pants or leggings, and I can't really say that I found the pattern easily transferable to another size or pattern.  The pattern itself was pretty straightforward, though.  You start at the waist, knit the body and bottom, then separate the yarn for the legs, which are done separately.  The crotch area is stitched.  EZ suggests a technique called weaving, which I had never tried before.  The end result is an invisible seam.  It looks like the area was knit in one piece.  A very clever and useful technique!  The original pattern called for the leggings to have booties at the bottom, but I was running short of yarn (again!), so I left them off. 

There were a lot of projects for February, and a lot of new things to learn, but because baby things are small, none of the projects took more than about a week to finish.  If I wasn't having constant yarn shortages, I probably would have finished this month's projects within the four weeks of February.  Still, I learned a lot, including, hopefully, how to better predict how much yarn I'll need.

Wednesday, May 9, 2012

Knitting the Knitter's Almanac - January

One of my goals this year is to knit my way through Elizabeth Zimmerman's Knitter's Almanac.  For non-knitters, Elizabeth Zimmermann was a prolific and influential knitter and designer whose patterns and work are well known by most knitters.  From what I've observed, knitters either love or hate EZ's patterns.  Her patterns often use mathematical formulas or vague instructions, which give a lot of leeway to the knitter following the pattern, but also require more thinking, creativity and math on the part of the individual knitter.  Depending on a person's reasons for knitting and ability level, her patterns can either be exciting and educational or frustrating and impossible.  Since I fall on the side of loving the creative and mathematical side of knitting, and thus EZ's style of pattern, I thought knitting through her Knitter's Almanac would be instructional and fun, and was a worthy project for the year. 

Unfortunately, I got a late start at January's project, an Aran (or cabled) sweater, because I was working on a non-knitting project that I wanted to finish.  I started knitting from the Almanac on January 24.  EZ's instructions for the Aran sweater include three cable patterns and the information and advice on how to arrange and adjust patterns to create your own individual sweater.  She also introduces the idea of first knitting a hat with exactly half the stitches needed for the sweater to see how your patterns will work together and to get a more accurate idea of the size your sweater will be.  This allows you to adjust your pattern if necessary for a better fit.

I used all three of EZ's cable patterns in my sweater, but I did not like the way she doubled up on the largest of the patterns in the center of her piece, so I modified her suggested pattern by centering the largest cable and adding two medium sized cables on either side.  I then knit the hat as suggested.


Front of hat

Side view
From knitting the hat, I learned I needed to add more stitches in order to make my sweater big enough, so I went back and modified my pattern, adding a few small cables and removing some of the spaces between the different cable patterns to add just the right amount of extra sweater.  I also noted that my added cable was not coming out as nicely as I would have liked.  EZ's patterns instructed me to knit through the back loop instead of the normal way, through the front loop, for the twisted cable.  This created a longer line, and also seemed to prevent some of the gapping that can occur when knitting cables.  The cable pattern I added did not use this back loop technique and thus did not look as clean as EZ's cables.  So, I decided on my sweater I would use the back loop technique to give the added a cable a consistent look with the other cables.
Compare EZ's twist on the left with the
twists of the new pattern on the right.

I knit the hat in only four days, but being twice as big around and five times as long, the sweater took a lot more time.  In addition, I had a few equipment problems while knitting that caused me to set the sweater aside temporarily.

Finished sweater 
Finished sweater
First, after I finished the tunic part of the sweater, I realized that the knitting needles I was using were too long for the sleeves.  I tried working the sleeves on double pointed needles (a technique that uses four or five special needles to knit in a circle rather than two needles with a cable in between), but found that the patterns were too complicated to work that way.  I needed a shorter circular needle set to complete the sleeves.  Then, I ran out of yarn before I finished the second sleeve, so I had to order more.  But finally, at the end of April, I finished all the parts of the sweater. Then came the hardest part.  The pattern instructed me to knit the body as a solid tube, and the sleeves as tapered tubes.  To attach the sleeves to the body, it told me to cut, yes cut, my work and stitch in my sleeves.  I was terrified!  I've never cut my work, and I was convinced it was a bad idea. . .  But I worked up the nerve, followed the instructions for machine basting the area and cutting and stitched in my sleeves.  It didn't destroy my work, and it looks quite nice, so while it's not a technique I truly feel comfortable with using on a regular basis, I won't necessarily shy away from doing it again if it seems the best method for a piece I'm making.

Detail of the front cable pattern
Detail of the other cable patterns.
Note the difference between the hat and sweater.
A lot of my reason for undertaking the project was to learn, so I just want to recap a few things I learned during this project.  Firstly, cables.  I had done a few cables before but certainly not this many or this intricate.  I certainly feel I understand cables better now, and could create my own or modify other cable patterns if I wanted or needed.  Secondly, a swatch hat.  I rarely make swatches to check my gauge, since I think they waste yarn (that's not to say I don't check my gauge, just that I don't make and keep swatches around to check my gauge).  But a hat isn't a waste of yarn, it's a useful item.  And seeing how the patterns work together is also useful.  So, for sweaters I'll probably use this technique to check and alter patterns I knit.  Thirdly, cutting.  As I said, it was new to me and scary.  But having overcome the fear, I see how it can be a beneficial tool in my arsenal of knitting, or rather finishing, techniques.

That it took me four months to complete a project expected to take only a month doesn't bode well for completing the rest of my goal of knitting the entire almanac in one year.  However, I wasn't idle during the times I put the project aside to get the right needles and yarn, so hopefully I'll be able to catch up.  Once I have February complete I'll post some pictures and commentary on those as well.