Showing posts with label crafts. Show all posts

Tuesday, August 13, 2013

Knitting the Knitter's Almanac - August

I'm long overdue for an update on my Knitter's Almanac project.  August's title is called Christmas Fiddle-Faddle, and the chapter details the construction of ornaments which one could use on a tree: an angel, a star, an evergreen tree and a net for holding fruit.


Star front
First up is a star.  I knit mine in some leftover yellow roving I had in my stash.  It was a pretty straightforward design knit in the round with regular decreases which make the points.


Star back
Front of tree
Next up  was the evergreen tree.  This was a bit more complicated.  It still used the technique of regular decreases to make points, but then when it was the right width, short rows were worked on half the stitches at a time to fill out the center.  Then it was folded in half and woven.  The last time short rows were used in the book (in the Maltese Fisherman's Hat), I forgot to do them properly, so they left a weird gap where the work was turned each time.  This time I remembered to wrap the stitches so the work is more seamless.  I again used left over yarn in green and white to make my snow covered tree. 

Back of tree
The next ornament was a net for holding a piece of fruit.  Very few people still put actual fruit on their trees these days, but these nets are for that purpose.  Personally, I don't think knitting was the right medium for making a net.  Crochet netting is far easier and looks better.  This pattern was not only difficult to follow but also difficult to execute.  Though the fact that I made it from leftover gold metallic thread probably did not make it easier.  Basically the net is knit by adding and then dropping stitches.  And since it's done on double pointed needles, there's a lot to keep track of at once.  But after several attempts, I managed to make something resembling a net.
Knit net holding a lime


Angel
The final project was an angel ornament.  Again, I used left over yarn to make this.  A small cone is basically knit into the top of which I stuffed a ball and then tied off.  A small cord is knit and threaded through for arms.  The whole think is pretty basic and I thought it would make a good dolly for my yarn loving cat.  She plays with it, but it hasn't diminished her love for all the rest of my yarn. . .
August was a pretty easy set of projects.  I was done them all in three days.  The shaping techniques were interesting, and I'm sure I'll be exploring them in the future, but there was not a whole lot new here. 


Tuesday, March 26, 2013

Crawling for Yarn

I've been taking a brief break from knitting through the Knitter's Almanac to work on a different project that I want to finish in time for the third annual Garden State Yarn Crawl, which will be the weekend of April 20 this year.  I've participated in the yarn crawl the last two years and enjoyed it immensely.  A yarn crawl, in case you're wondering, is pretty much what it sounds like: Crafters travel from yarn store to yarn store (around 15 total) to participate in events, enter raffles, and learn about the stores in their area.  During the first yarn crawl, I learned of a unique store near me that combined yarn and pottery, and shortly after I started taking pottery lessons there.  Sadly, the owner sold the store, and the new owners dropped the pottery portion of the store, so no more pottery lessons for me.  On the second crawl, I was introduced to a brand new store very close to me, that I liked much better than the other nearby store I knew of.  It is now my official "lys", or local yarn store.  This year, there are a number of new and different stores on the crawl and I'm looking forward to exploring them.  Although, confession time: I order most of my yarn on line from Knit Picks, since I'm on a budget and their yarn is usually much cheaper than yarn from a retail store.  I'm not getting the gorgeous colors and amazing yarns that I might at a brick and mortar store, but I spend less, so it's worth the sacrifice to me.

On the first crawl, I was unprepared for visiting so many yarn stores.  I was in the middle of several projects for which I already had yarn and needles, and I had not given much thought to future projects and the yarn I might need for them.  I felt a little guilty visiting so many beautiful yarn stores and not purchasing anything.  So, the second year, I made a plan.  I had seen a pattern for a poncho knit in a variety of novelty yarns, and had been contemplating making something similar.  I decided to purchase a single skein of novelty yarn at each store on the crawl and use them to knit a "yarn crawl poncho". 

Yarn Crawl Poncho
The poncho was a pretty simple project, that took me only a few weeks, despite the size.  I didn't like the original pattern that inspired the project, so I just created my own pattern using techniques I've picked up along the way, some from the Knitter's Almanac project.  I'm somewhat unsure how to credit this creation.  On the one hand it was very clearly inspired by an existing published pattern.  On the other, the construction, yarn selection, and design of this particular poncho are my own.  Even when following a pattern, most knitters make changes to the pattern as written, substituting yarn, perhaps adjusting needle size to meet the gauge, or altering the gauge to fit better.  At what point do these changes become a unique pattern separate from the original?

I'm still trying to think what I might do this year.  I definitely feel like I want to support the participating stores, but I certainly don't want to do another poncho.  I'm pleased with the way this one turned out, but I had forgotten how annoying ponchos were for doing anything in.  I'm all set with yarn for the rest of the Knitter's Almanac projects, so I would be buying yarn for a project or projects that probably won't be knit for at least a year.  I had thought maybe of enhancing my needle selection, but needle prices vary pretty greatly from store to store and I'd feel like I was over paying if I bought one set at one store for $4 and another at another store for $10.  Any suggestions?


Monday, February 25, 2013

Knitting the Knitter's Almanac - July

July's project is a circular lace shawl, which Ms. Zimmermann bills as a great travel project.  She's right too: knit on circular needles from the inside out, the shawl makes a pouch as you knit it that is great for holding the yarn and pattern when you take it places.  I purchased some lace-weight wool yarn in a sand color for the shawl. 


Pi Shawl
Although she calls it just a circular shawl, the pattern is widely known as the Pi Shawl because it loosely uses geometry in its increase pattern.  Basically the pattern has you double your stitches, then knit a number of rows to equal 1/6 (or 1/2π) of the number of stitches.  It roughly uses the formula for the circumference of a circle related to its radius.  It's not perfect: pi obviously doesn't equal 3, the height of a stitch is not exactly the width of a stitch, and it means that the earlier rows after an increase are not proportionate; but happily with knitting, once it's washed and blocked these imperfections disappear.  The simple increase pattern and large sections of equal rows allow a lot of room for variation and personalization.  Any lace pattern can be inserted into each of the sections, and Ms. Zimmermann encourages experimentation. She does give her own simple patterns to insert, however, and I mostly followed the instructions she gave, except for the border. 


Lace Border
For the border, Ms. Zimmermann expands upon a technique we learned in February for knitting a sideways border.  This time, instead of simple garter stitch, she suggests using a lace pattern, but still followed the same technique of joining the border to the main piece by casting on directly from the last row, and knitting one stitch from the main piece together with the last stitch of every other row of the border pattern.  Instead of the loop edging that Ms. Zimmermann gives in the book, I found a lace edging pattern that I thought complemented the lace patterns in the rest of the shawl and used that.

This project was a favorite with my cat Columbine, and not particularly in a good way.  She very stereotypically loves to play with yarn, and frequently steals my projects and takes them to her lair under the couch.  While I certainly don't encourage this behavior, usually her playing with a project doesn't harm the work too much.  But as I soon learned, in the case of fine lace yarn, sharp kitty teeth, even only for a second, can be disastrous.  I was about halfway done the project when I noticed four growing holes in the earlier part of the shawl.  Not seeing how I could repair the damage, I sadly unraveled the whole project and started over, this time carefully guarding my project, by making sure to seal it in a bag before walking away from it. 


First bag, lots of teeth marks
Second bag, fewer teeth marks,
but enough to damage my work
Unfortunately, having had a taste for lace yarn, Columbine was determined to get to my project, and the sealed bag was just an added challenge.  She put tons of tiny teeth holes in the bag, eventually causing the bag to get some larger holes.  So I added a second sealable bag, enshrining my work twice every time I put it aside.  And yet, just as I was about two thirds of the way done, I noticed two holes that were not part of the lace pattern.  This time, I caught it before they were too big, and the placement of the holes was luckily not over a lacy area, so I was able to (inexpertly) fix it instead of starting over.  After that, I purchased a plastic box to keep my work in when I'm not working on it.  A box, I might add, my cat is desperately trying to figure out how to open.
Inexpert mending

Aside from the lessons learned about keeping my projects away from my cats, there was not a whole lot to take away from this chapter.  I've knit lace patterns before, so that was not new to me.  I can see the applications for the pi formula of increases, but as I indicated above, it's not perfect, and I'll probably explore other techniques before returning to this one.  The sideways border we already did, and though the lace application is new, I had already made the leap to that as a possibility.  But I do have a lovely new shawl in a neutral color to add to my wardrobe, so despite the lack of new techniques, I'd call this month's project a success.

Center of shawl
Outer edge


Thursday, January 3, 2013

Knitting the Knitter's Almanac - June

June's project from the Knitter's Almanac is hats.  When my sister first learned to knit, all she knitted were hats.  I can't blame her; hats are the perfect knitting project.  They are practical, good for oneself or as gifts, they are neither too small nor too ambitious a project, they don't use up a lot of yarn, and they can employ a number of different techniques, giving one endless possibilities. 

Unlike the mitten chapter, the text of the chapter simply outlines the methods for the three hats whose patterns are detailed at the end of the chapter.  Thus it was quite clear what I needed to do to consider this chapter complete: knit three hats.

Ganomy Hat
The first of the three hats I knit was the Ganomy Hat.  The idea behind this pattern was to use the same miter pattern used in last month's mittens (regular increases and decreases) to make ear flaps.  The end result looks a lot like a Gnome's hat.  When I first saw the pattern name, I was pronouncing it as I read it, with equal length syllables and the stress on the first syllable.  As I was describing the hat to my husband however, I realized, the correct pronunciation is really G-nomy, pronouncing the "G" sound as a sort of separate but quick syllable before the rest of the word, the same way I pronounce gnome, actually.  Yet another example of the way Ms. Zimmermann and I think alike.  I followed this pattern exactly as written using leftover yarn from January's Aran Sweater and from April's Afghan to make the hat.


Maltese Fisherman's Hat
The second of the hats I knit was the Maltese Fisherman's Hat.  This is another ear flapped hat that she recreated from a hat someone brought back from vacation.  The gauge she gives for the hat of 5½ stitches to 2" was impossible for me to achieve with the yarn and needles I had on hand, so I had to adjust the pattern so I was making an adult sized hat instead of a child sized one.  I decided the easiest adjustment to make would be to knit it at a gauge of 5½ stitches to 1", basically doubling the necessary stitches indicated.  This hat's ear flaps are knit first by knitting back and forth instead of in the round, and then more stitches are cast on for the front of the hat and then joined and continued in the round.  The ear flaps are somewhat asymmetrical as a result of the shaping instructions, but they do cover the ears properly.  For this hat I used up some more yarn I had on hand left over from various projects, trying to keep them to matching or complementary hues.  I did not "make the tassel of [my] dreams" as directed, however. 

Three-Cornered Hat
The third and final hat I knit was the Three-Cornered Hat, basically a variation on a tam-o'-shanter.  This one again called for an impossible gauge, so I did the same thing as for the Maltese Fisherman's Hat and doubled the pattern to make an adult sized hat.  This hat again uses increases and decreases for shaping, but instead of four equal points like the Mitered Mittens and the Ganomy Hat, it has three, making a tri-cornered hat.  The hat is increased off the head, and then sharply decreased to give it the flat look of a tam.  I again used up yarn I had on hand for this project.

This experiment in hats didn't really offer a lot by way of new techniques.  I did have to work with adjusting a pattern to meet my gauge, but that is something I've done before.  The shaping techniques were all ones I've already used on projects from this book, though it did show the various ways those techniques could be put to use.  The biggest takeaway for me was how easy and enjoyable hats are, and how useful as a means of using up those last bits of yarn from other projects.  You'll notice I didn't buy yarn for the last two months of projects.  I could easily see the usefulness of knitting a bunch of mittens and hats for gifts every year from the leftover yarn accumulated from other projects. 

Sunday, December 30, 2012

Knitting the Knitter's Almanac - May

At this point, it is clear that I will not be finishing the projects in the Knitter's Almanac in a single year, but I'm happy to say that I have at least made it though half of the year, and will continue this project into 2013 to its completion.  I clearly do not knit as much as Elizabeth Zimmermann, but since I do have other things to occupy my time (some more worthy than others) I'm not too upset with only making it halfway.

May's project is mittens.  It seems a little odd to be knitting mittens in the spring, but Ms. Zimmermann notes that this way you are not rushed to finish them as you might be at the end of the year.  Since I was not knitting mine for anyone in particular, I wasn't rushed, even though I started them in November.  It was somewhat unclear how many mittens I should knit to consider this chapter complete.  The text discusses various techniques and talks about knitting three mittens for children, since they are so easy to lose, but there are only two patterns at the end of the chapter, so in the end I knit these patterns, incorporating the techniques discussed into both.


Norwegian Mittens
Close up of cuff
Close up of color work snowflakes
The first pair of mittens I knit were the Norwegian Mittens.  The back has a snow flake pattern in two colors, and the palm has a simple checked pattern.  I decided to use my hand spun, hand dyed yarn for these.  The mittens have a very long cuff, meant to go over the coat sleeve, and they look huge when off your hands, but they fit quite nicely once on.  I knit these pretty much as written, though I modified the color work slightly.  The thumb of these comes off the palm, and it uses what Ms. Zimmermann calls the "Thumb Trick", basically scrap wool is knit in to the area where you wish the thumb to be, then the rest of the mitten is knit, and when finished, the scrap yarn is removed, stitches are picked up and the thumb is knit.  It creates a seamless join for the thumb.  I've used this technique before for sleeves as well.  Since I was working with a limited supply of irreplaceable yarn, I had to be careful how much of each color I used on the first mitten to be sure I would have enough for the second.  I ended up using most of the green and undyed yarn, but with plenty of the red left over.

The second pair of mittens I knit were the Mitered Mittens.  The idea behind the Mitered Mittens was to increase and decrease evenly around to create a zig-zag or chevron pattern in the knitting.  It looks good knit in a single color, but when additional colors are added, the shaping really shows up.  I decided to continue using the red dyed homespun, and used undyed yarn, first my own hand spun, and then yarn I had left over from January's project, as the contrasting color.  For these mittens, I decided to use two of EZ's suggested techniques for mittens. 


Idiot Cord Border
The first was what she calls the "Idiot Cord Border".  Stockinette stitching, the most common form of knitted work, has a tendency to curl in on itself both vertically and horizontally.  To counteract this, an edge must be worked in a different type of stitch.  In the first pair of mittens, I used a ribbed stitch, as suggested in the pattern.  Many of the previous knit projects have used garter stitch as the edging.  The Idiot Cord Border is another technique that can be used to counteract the curling.  Idiot Cord, or I-cord, is basically a thin knit tube.  The border technique is to make the cord with as many rows as you would cast on stitches, then pick up a stitch per row and start knitting. 


Mitered Mittens
The second technique I incorporated into these mittens was to put the thumb out from the side rather than the palm.  EZ suggests doing this so that the mittens can all be knit the same way, instead of mirrored, as I needed to do for the Norwegian Mittens.  As she points out, once you wear the mittens, they mold to your hand and become right handed and left handed mittens, even if you don't knit them that way.  This is why she can knit them in sets of three as noted above.  Personally, I'm not in love with the aesthetic result of joining the thumb from the side on the mitered mitten, since the thumb comes out of one of points in the shaping pattern, but I'm not sure it would have looked better elsewhere either, and I did want to incorporate as many of the suggested techniques in the two pairs of mittens as possible. 

Mittens were pretty quick and easy projects, and great for using up yarn on hand instead of buying (and running out of) more.  In fact, my only complaint with mittens was that I had to knit two of them. Having to do the same project twice in a row is somewhat tedious to someone like me who is constantly looking for something new and different to do. Fortunately, the small size makes it somewhat easier to bear, though I may have to learn how to knit two at once, a technique employed by many sock knitters, if I decide to knit more mittens. 

As a final note, this is the first Almanac chapter for which I did not run out of yarn, so hopefully I'm starting a new trend in yarn usage. 

Monday, December 24, 2012

Knitting the Knitter's Almanac - April

I know, I know, it's December and I'm posting about the April project from the Knitter's Almanac.  Clearly, I'm not making it through the book in only one year. . .

April's project is an afghan, specifically designed to mask it's construction techniques, which I'm going to reveal here anyway.  The design is similar to the "Granny Square" assembly popular with old fashioned (and newer designs as well I suppose) crocheted afghans and blankets.  Basically a number of identical or similar squares are made, joined and a border worked.  This type of blanket is not my favorite in crochet, and it has the same drawbacks when knit.  Knitting the squares is quick, easy and enjoyable, though making them the same can sometimes pose a problem.  However, after you have enough squares, these must be joined, a tedious project, and then a myriad of ends must be woven in to finish the problem.  Think about it, assuming you can knit a square with one skein, or a portion of one skein, of yarn, you have two ends (the start and stop) for each square.  Some of these ends can be worked in while working the project; for example, I always knit or crochet in my start end by knitting with the regular yarn and the end until the end is used up.  And you can use the other end for part or all of the joining work, if you've left a long enough tail, but there will inevitably be ends that can't be worked in this way, that will have to be woven in after, a task I hate doing and which delays my final completion of many projects.

For this blanket, I purchased ten skeins of a recycled wool (which I partly chose because of its cost per linear yard), and vowed that I would make the blanket so I did not have to purchase additional yarn.  Initially I had hoped to be able to knit 54 squares to create a 6x9 ratio, however, it quickly became apparent that I was not getting 5.4 squares out of a single skein of yarn, and knowing that I would need additional yarn for connecting the squares and making the border, I decreased my square goal to 48, for a 6x8 ratio.  At first I joined the squares as I went, but it became clear that I would actually conserve yarn if I did all the weaving at the end, so I stopped doing that after only nine squares were joined.

The squares are knit in a pretty simple manner, they are worked in the round from the inside out with 4 evenly spaced increases to create a square.  This is the same basic pattern as the baby blanket from February.  When knitting from the center out, you must start with a very small number of stitches which cannot be worked on a circular needle, but must be worked on four smaller straight needles, called double pointed needles or dpn for short.  While I have worked with dpn before, usually it has been at the other end of the project, namely as I worked inward from the outside, decreasing instead of increasing.  Since in that direction you have the entire weight of an almost finished project, it is somewhat easier to manipulate and use the needles.  Dropped stitches, a common problem with dpn, since they do not have any stops on the ends, can be seen and picked up easily.  However, when starting a project this way, dropped stitches are harder to identify and reclaim, and it's ends up being easier to just pull everything off and start over.  Additionally, because you're just starting the pattern, it's much easier for the needles to get twisted and you end up knitting some weird formation instead of the circle you were aiming for.  I had all of these problems with the first few squares, but 48 squares means a lot of practice.  I feel I'm practically an expert at starting projects on dpn at this point.  Once I worked out the kinks of working with dpn, the squares were pretty easy mindless work, though I did have to make sure the row count was accurate so the squares came out uniform in size.


Early attempt at weaving -
note the raised area to the right side
not particularly invisible
Later weaving -
much more difficult to see the join
Once all the squares were finished, I faced the daunting task of joining them.  For this Ms. Zimmermann suggests weaving, a technique I learned back in February, but had not perfected.  Again, after 82 woven joins, I'm practically an expert now.  The advantage of weaving, and the reason EZ suggests it, is that it looks like knitting.  Since one of the reasons for the design of this blanket was to fool the eye, the weaving makes it difficult to tell that the seams are such, so it's not clear where one square ends and the next begins.  You can see the progress in my weaving ability by comparing my earlier woven joins with later ones. 


Close up of a portion of the blanket
showing the larger square, the joins
and the smaller corner squares.
To further fool the eye, the corner five stitches of each square are not joined by weaving, instead they are picked up along with the three neighboring squares' corners and knit together in a miniature square.  This was useful because I was able to pick up all the ends from the weaving and work them into the project, but knitting with four tiny strands and a main strand of yarn wasn't particularly easy or enjoyable.  I found I liked the weaving much more than knitting these tiny squares.  Once I had worked and joined the squares, it was time for the border.  Unfortunately, despite my best laid plans I ran out of yarn.  I swear I'm cursed.  So more had to be purchased to do the border, a plain garter stitch one, but with an interesting method of mitering the corners, that I can see myself using again.  After all the work was done, I faced the dreaded task mentioned above of weaving in ends.  This project has actually been done for a month except for that final step.  I knitted several other things (moving on to May and June) before I finally told myself I could not start a new project until I finished this one.

I'd like to say that after dreading the task, it was far easier than I feared, something I find happens a lot with things one dreads to tackle.  But no, it took me several hours to weave in all those ends and create a finished blanket.  However, all that weaving practice earlier paid off.  In addition to getting good at joining using weaving, the process helped me to fully understand the path the yarn takes when knit, making weaving in the ends far easier, and hopefully more secure.


Finished blanket, very large.
The finished piece is very large and I think it is quite attractive.  I've seen some examples on line where people knit the squares in multiple colors or left over yarn, and I think this construction looks good pretty much every way it's been done.  I could see myself doing a blanket like this again, though maybe not quite so large, though I'll admit, the thought of all those ends to weave might well discourage me.

Tuesday, October 9, 2012

Spinning

My homespun and crock pot dyed yarn.
Back in June I took a four week spinning class, no not at the gym, but at a yarn store.  The class taught both drop spindle and wheel spinning and the history and techniques for turning fiber into yarn. 

I've always wanted to learn to spin, especially given my fondness for high-end, natural yarns, and my personal proclivity for self-sufficiency skills, but was afraid it would be a difficult and expensive hobby to pick up.  I found out in the class that it was not really either of those things. 

The class started with how to prepare a wool fleece for spinning and an introduction to the drop spindle, probably the earliest form of spinning.  Maybe because it was my first attempt, or simply the primitive nature of the method, but the yarn I spun on the drop spindle was somewhat bulky and uneven.  Still, it was distinguishable as yarn, so not too bad.  The class lent us the tools we would need and gave us enough fiber to practice what we had learned over the week.  I ended up using all of the first week's fiber in one day!  You might say I enjoyed it. 

From there we progressed to the spinning wheel.  The shop sells wheels, so we were able to test a variety of modern wheels to determine which we liked best.  I ended up borrowing an Ashford wheel for the next three weeks.  Once the basics of pedaling the wheel and feeding the fiber were mastered, spinning was a pretty easy and relaxing activity.  Despite the contraption required and all the adjustments and parts to fidget with in order to get the wheel working right, I found wheel spinning to be far easier than spinning on the drop spindle.  I guess that's why the wheel was invented and became so popular. . .

After learning to spin single strands in the second week, we learned how to ply multiple strands together to make yarn in the third.  Since I kept using up my weekly allotment of fiber, I purchased more to keep practicing.  Having now made a few skeins of homespun yarn, I decided to try another new craft, and dye the yarn. 

I had read on line about dying yarn in a crock pot using food-grade dyes, and thought my homespun yarn would be a perfect opportunity to try this out.  It turned out to be a no-fuss way to color yarn, and I ended up dying two separate batches in different colors.

In the first three classes we were spinning wool, but in the final class we tested a variety of different types of fiber, both natural and synthetic to learn their unique characteristics and traits.  We created small sample skeins of the fibers we tried to keep as a record and reference.

I really enjoyed the class, and am pleased to add a new skill to my repertoire.  Once I'm finished with my Almanac project and have saved the money to buy my own wheel, I'd like to do a "Sheep to Shawl" type project. My research indicates that spinning your own yarn is not particularly thrifty. The fiber needed frequently costs about as much as some of the more inexpensive yarns; and once you factor in the extra time it would take to spin, it really doesn't seem cost effective.  As with most craft things, the cost to make it yourself can't compete with the cost of mass-produced items.  Of course, spinning my own yarn means I can create custom articles perfectly tailored to their recipients that have value far beyond anything mass produced, plus I have the enjoyment of the creative process and the pride of being able say "I made that".

Friday, August 3, 2012

Knitting the Knitter's Almanac - March

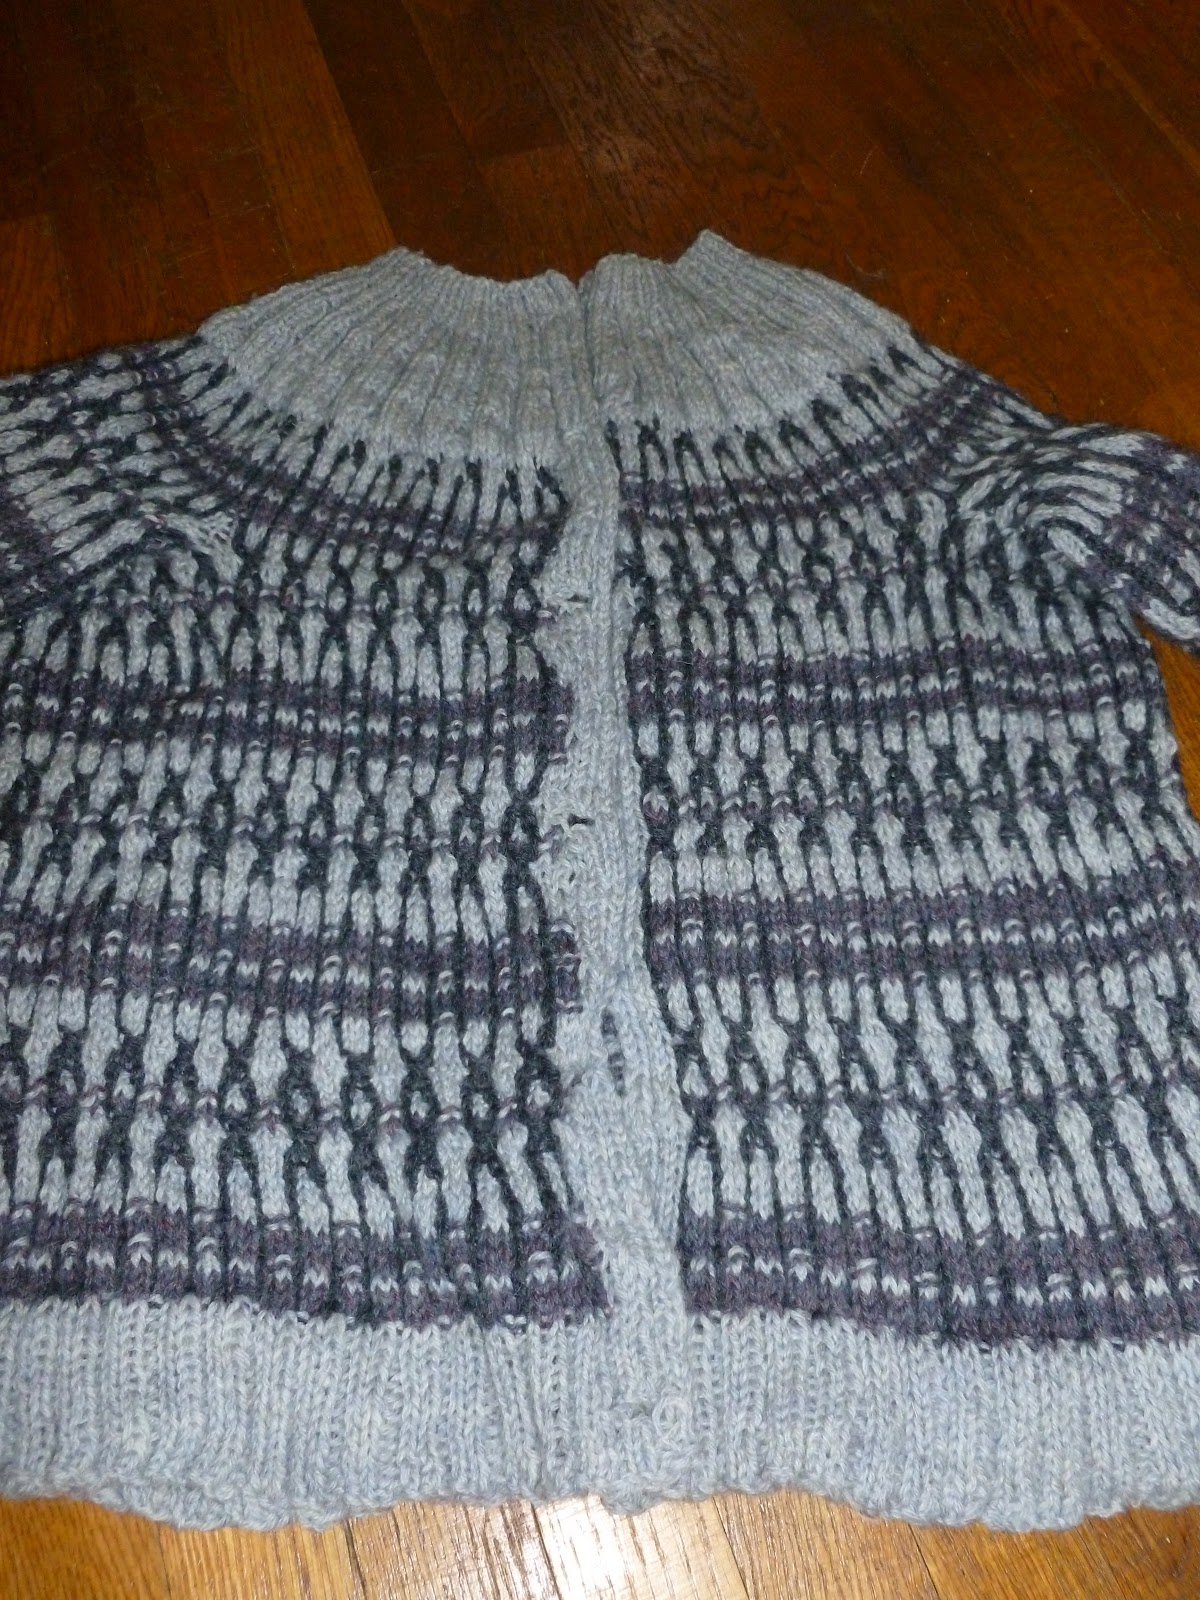
I wasn't idle for three months while I waited for yarn to complete February's projects.  Instead, I started and finished March's project in the interim.  March's project is a sweater in three colors.  The pattern is a combination of the color work of Fair Isle knits with the flowing lines of Aran designs to create a trellis type motif.  It's a fairly easy pattern, but of course knitting a large sweater takes time. 


Chainmail Hat
As usual, we started with a hat to get a sense of our individual gauge and to practice the pattern.  My hat came out a little snug for my head, and I'm not as pleased with the tapering at the top as my last hat, but it looks fine nonetheless. 

Ms. Zimmermann starts the chapter with a discussion of how much yarn to buy, clearly an area I've been having trouble with.  I'd like to pretend that I managed to purchase the right amount of yarn this time around, but that would be untrue.  I did realize I had purchased too little before I started knitting though, so I went back and got more.  And I'm happy to report that I had enough to finish the project after that.


Chainmail Sweater

For the sweater, I decided to make some adjustments to the pattern as written.  To begin with, EZ's instructions for the sweater were the same as January's Aran sweater - a large tube with tapered tube sleeves stitched in.  I thought that it would be interesting and educational to use her formula-based baby sweater pattern from February to knit an adult sweater.  So I do the necessary math to create a cardigan sweater using the chainmail motif.  I then adjusted the motif pattern slightly to reflect the ratios of yarn I had purchased to be sure I was using it evenly and wouldn't run out of one color too soon.  After my initial design work I set to knitting (and knitting and knitting - sweaters take forever!).  I knit til I ran out of the darkest color wool I was using for the vertical lines, then finished the bottom ribbing and cast off.  The sweater turned out to be just the right size and I had very little of the other two colors of wool left over, so all around a success in wool purchasing (at least by my standards).


Close up of color change
One other technique introduced in this chapter was a color blending technique using purl stitches on the first row with a new color.  The result is a more gradual color change than simply knitting the row as usual.  It's rather hard to describe, but if you look at the close up, you can see that where the two colors join with knit stitches there's a jagged edge, but where they are joined with purl stitches, there's a raised bump of the old color in the field of the new color.  Close up it's not particularly attractive, but from afar, the color change looks more blended and less sharp.

I feel like there were fewer new techniques and lessons in this chapter than the two previous ones, but I still gained a lot from knitting this sweater.  I'm looking forward to the next few months of practice and improvement.

Thursday, July 26, 2012

Knitting the Knitter's Almanac - February

It's July and I've only just finished up the Knitter's Almanac February projects.  To be fair, I've been done most of the projects since April, but (surprise!) I ran out of yarn before finishing everything.  Since the yarn I wanted was on back order until July, I had to wait until it came in before I could complete the last project.

February's chapter is dedicated to baby things, so there are a number of small projects:  A blanket, a sweater, leggings and a shawl.  Each features a different technique, and I learned a number of new things in the process.

Double Knitting Potholder
First up was the blanket featuring a new-to-me technique called double knitting.  Basically, you are knitting two sides of a bag at once.  When the two sides are joined on all sides, you get a very cushy blanket.  The whole time I was knitting it, I would frequently stop to appreciate how squishy it was.  I also made anyone interested in my knitting touch the squishy.  To get a handle on the new technique, Ms. Zimmermann suggests making a potholder first, just a very small square using the technique. 


Double Knitting Blanket
Edge detail - note the poofiness of
the main portion of the blanket
Successful potholder under my belt, I proceeded to the blanket.  I said I wasn't going to order more yarn I was just going to knit up what I had purchased for the project and be done with it, but it really was too small to be useful once I'd used up the yarn, so I bought another skein to make it just a bit larger.  The result is a small but useful-sized baby blanket or tummy time mat and a new technique mastered.


Baby Sweater
Next up was a baby sweater.  In this chapter EZ introduces us to her sweater formula explaining how to make a sweater in any size using percentages.  Her pattern is knit all in one piece and the only finishing seams necessary are the underarm seams.  It occurs to me that even these seams could be eliminated, but I have not yet tested this theory.  Anyway, the sweater knit up quickly, but it used all of the yarn I had purchased for the sweater and the matching leggings, causing the next project, the leggings to be put on hold.

Shawl pattern - more a blanket
I then proceeded to the shawl pattern.  The shawl pattern is knit starting from the center and increasing every other round at four equal points to make a square.  The original pattern is stocking stitch throughout, but EZ suggests that a lace pattern could be incorporated in each of the quarters, which I did.  I found a simple lace pattern I liked and added it as space became available.  In the end, the yarn I had purchased was much too bulky to really make a shawl, so I would call the end result another blanket.  But the techniques learned to make a square piece from the inside out and how to introduce lace patterns will prove useful in the future.

As I mentioned, I had planned to make the leggings and sweater to match, but used up all of the yarn I purchased for both projects on the sweater.  By the time I realized I would need more yarn, the yarn was back ordered and I couldn't get it until July.  Since I knew that would also mean a different dye lot, I decided to go with a different color altogether.  Unfortunately the other colors I thought would look good with the sweater's grey, were also all backlogged, so I had no choice but to wait.  When the yarn finally came in, I started the leggings pattern.  This was my first attempt at knitting pants or leggings, and I can't really say that I found the pattern easily transferable to another size or pattern.  The pattern itself was pretty straightforward, though.  You start at the waist, knit the body and bottom, then separate the yarn for the legs, which are done separately.  The crotch area is stitched.  EZ suggests a technique called weaving, which I had never tried before.  The end result is an invisible seam.  It looks like the area was knit in one piece.  A very clever and useful technique!  The original pattern called for the leggings to have booties at the bottom, but I was running short of yarn (again!), so I left them off. 

There were a lot of projects for February, and a lot of new things to learn, but because baby things are small, none of the projects took more than about a week to finish.  If I wasn't having constant yarn shortages, I probably would have finished this month's projects within the four weeks of February.  Still, I learned a lot, including, hopefully, how to better predict how much yarn I'll need.

Wednesday, May 9, 2012

Knitting the Knitter's Almanac - January

One of my goals this year is to knit my way through Elizabeth Zimmerman's Knitter's Almanac.  For non-knitters, Elizabeth Zimmermann was a prolific and influential knitter and designer whose patterns and work are well known by most knitters.  From what I've observed, knitters either love or hate EZ's patterns.  Her patterns often use mathematical formulas or vague instructions, which give a lot of leeway to the knitter following the pattern, but also require more thinking, creativity and math on the part of the individual knitter.  Depending on a person's reasons for knitting and ability level, her patterns can either be exciting and educational or frustrating and impossible.  Since I fall on the side of loving the creative and mathematical side of knitting, and thus EZ's style of pattern, I thought knitting through her Knitter's Almanac would be instructional and fun, and was a worthy project for the year. 

Unfortunately, I got a late start at January's project, an Aran (or cabled) sweater, because I was working on a non-knitting project that I wanted to finish.  I started knitting from the Almanac on January 24.  EZ's instructions for the Aran sweater include three cable patterns and the information and advice on how to arrange and adjust patterns to create your own individual sweater.  She also introduces the idea of first knitting a hat with exactly half the stitches needed for the sweater to see how your patterns will work together and to get a more accurate idea of the size your sweater will be.  This allows you to adjust your pattern if necessary for a better fit.

I used all three of EZ's cable patterns in my sweater, but I did not like the way she doubled up on the largest of the patterns in the center of her piece, so I modified her suggested pattern by centering the largest cable and adding two medium sized cables on either side.  I then knit the hat as suggested.


Front of hat

Side view
From knitting the hat, I learned I needed to add more stitches in order to make my sweater big enough, so I went back and modified my pattern, adding a few small cables and removing some of the spaces between the different cable patterns to add just the right amount of extra sweater.  I also noted that my added cable was not coming out as nicely as I would have liked.  EZ's patterns instructed me to knit through the back loop instead of the normal way, through the front loop, for the twisted cable.  This created a longer line, and also seemed to prevent some of the gapping that can occur when knitting cables.  The cable pattern I added did not use this back loop technique and thus did not look as clean as EZ's cables.  So, I decided on my sweater I would use the back loop technique to give the added a cable a consistent look with the other cables.
Compare EZ's twist on the left with the
twists of the new pattern on the right.

I knit the hat in only four days, but being twice as big around and five times as long, the sweater took a lot more time.  In addition, I had a few equipment problems while knitting that caused me to set the sweater aside temporarily.

Finished sweater 
Finished sweater
First, after I finished the tunic part of the sweater, I realized that the knitting needles I was using were too long for the sleeves.  I tried working the sleeves on double pointed needles (a technique that uses four or five special needles to knit in a circle rather than two needles with a cable in between), but found that the patterns were too complicated to work that way.  I needed a shorter circular needle set to complete the sleeves.  Then, I ran out of yarn before I finished the second sleeve, so I had to order more.  But finally, at the end of April, I finished all the parts of the sweater. Then came the hardest part.  The pattern instructed me to knit the body as a solid tube, and the sleeves as tapered tubes.  To attach the sleeves to the body, it told me to cut, yes cut, my work and stitch in my sleeves.  I was terrified!  I've never cut my work, and I was convinced it was a bad idea. . .  But I worked up the nerve, followed the instructions for machine basting the area and cutting and stitched in my sleeves.  It didn't destroy my work, and it looks quite nice, so while it's not a technique I truly feel comfortable with using on a regular basis, I won't necessarily shy away from doing it again if it seems the best method for a piece I'm making.

Detail of the front cable pattern
Detail of the other cable patterns.
Note the difference between the hat and sweater.
A lot of my reason for undertaking the project was to learn, so I just want to recap a few things I learned during this project.  Firstly, cables.  I had done a few cables before but certainly not this many or this intricate.  I certainly feel I understand cables better now, and could create my own or modify other cable patterns if I wanted or needed.  Secondly, a swatch hat.  I rarely make swatches to check my gauge, since I think they waste yarn (that's not to say I don't check my gauge, just that I don't make and keep swatches around to check my gauge).  But a hat isn't a waste of yarn, it's a useful item.  And seeing how the patterns work together is also useful.  So, for sweaters I'll probably use this technique to check and alter patterns I knit.  Thirdly, cutting.  As I said, it was new to me and scary.  But having overcome the fear, I see how it can be a beneficial tool in my arsenal of knitting, or rather finishing, techniques.

That it took me four months to complete a project expected to take only a month doesn't bode well for completing the rest of my goal of knitting the entire almanac in one year.  However, I wasn't idle during the times I put the project aside to get the right needles and yarn, so hopefully I'll be able to catch up.  Once I have February complete I'll post some pictures and commentary on those as well.

Monday, March 21, 2011

Felting Woes

For the past year, I’ve been sporadically working on a large, crocheted throw. The throw is made up of 25 individual felted squares which tie together to form a blanket. The crochet work wasn’t hard, but it took a long time, so I was very excited when I finally finished and was ready to begin my first felting attempt. I did some research to find the best way to felt my work in the washing machine. Everyone agreed: some ivory soap, heavy duty cycle, hottest wash, lowest amount of water, check frequently to make sure your piece hasn’t shrunk too much. I followed the instructions to the letter, but my results were nowhere near the level of feltedness I was looking for (read practically unfelted). What was I doing wrong? No one even mentioned the possibility that a full wash cycle wouldn’t felt my piece. I thought about running it through again, but at the very slow rate it was felting per wash, I was afraid it would take way too many cycles to actually reach felt quality. I tried hand felting it, but it took even longer to felt just one square. I couldn’t imagine felting 25 by hand. So, I did some more research. I didn’t find anything new, except one throwaway line on someone’s website about not bothering to add boiling water to the wash. None of the instructions I read mentioned the boiling water trick, so I thought maybe I’d give it a try. After some experimentation, I came up with a method that finally achieved results, although it wasn’t as simple as throw it in the wash. In the interest of helping others who may also have overly gentle washing machines achieve felting perfection, I’m sharing the technique that worked for me.
  1. Put your piece in the washing machine with about 1 tablespoon of liquid ivory soap. If the load is small, add something cotton and non-pilling (no towels) to the load. I used a white canvas laundry bag I happened to have around.
  2. Set the washer to its hottest temperature, lowest amount of water, and the heavy duty load.
  3. Start the washer.
  4. Put a pot of water on to boil.
  5. Watch the washer, as soon as the wash cycle is completed and before the rinse cycle starts, stop the machine and check your piece. If it is felted to your liking skip to step 7, otherwise move on to the next step.
  6. Add the pot of boiling water to the machine, and restart the wash cycle. Put another pot on to boil. Repeat this step until the piece is felted to your liking.
  7. Once your piece is felted perfectly, change the water temperature to the coldest setting, and let the washing machine continue through the rinse and spin cycles.
  8. Remove your piece from your machine, shape it, and let it air dry.

I ended up running my pieces through the wash cycle about 7 times before it actually looked like felt. I’m glad I finally figured it out, and my blanket is now even closer to being done. I can’t wait to have a finished product after working on this project for so long.

Thursday, April 8, 2010

A Tale of Two Yarn Stores

If you've read my first post, you know that I crochet and knit as a hobby. Obviously, both hobbies require yarn. I get most of my yarn, like pretty much everything else, on line. Unfortunately, yarn is one of those products that it is nice to see and touch before purchasing, so I do like to visit yarn stores from time to time. Most yarn stores fall into one of two categories, which can be illustrated by my recent visits to two different stores.

At the first store, there is a living room set up with a couch and chairs and coffee table to the left of the entrance, in front of a picture window. The cash register is straight ahead on the right hand side. The yarn is arranged on shelves located in two rooms beyond, and in a small area behind the couch. A group of people were sitting in the living room area knitting and talking. An employee was at the cash register, and another employee was in a back room apparently working on inventory or some other business function. The employee at the cash register was chatting with the knitting group, but when we walked in, greeted us and asked us if we needed any help. We said we just wanted to look and proceeded to do just that. I ended up purchasing some yarn, and she wound the skeins into balls for ease of use for me.

At the second store, there is a card table set up to the left of the entrance, running long ways away from the front of the store. The cash register is to the right on a counter. The yarn is arranged in shelves along all of the walls, some of it behind the counter that the cash register is on, and some behind the table, which is surrounded by folding chairs and a group of people knitting and talking. No one is at the cash register; everyone in the store is knitting at the table. One of the people at the table stands up as we walk in and asks if she can help us. We say we're just looking, and proceed to do so. But it's awkward to get to some of the yarn because it's blocked by people knitting, or is behind the register, where customers aren't supposed to go. We leave.

I don't know if I succeeded in explaining the subtle differences between the two stores, but the first felt welcoming and inviting. The second felt as if we were intruding. A quick analysis of the differences:

1) The knitting area - both stores included an area for knitters to relax and work on their craft and talk with others. In theory this should be a welcoming feature in both stores, but it's not. In the first store, the knitting area is set up like a cozy living room with a sofa and chairs. In the second store, it's a multipurpose card table with folding chairs.

2) Layout - In the first store, the yarn is laid out on shelves that meander through the store. The store feels a little cramped, but is not disorganized, in fact, the yarn is sorted in ways knitters will appreciate - sock yarn is in one area, bulky yarns are in another, fine silk yarn in yet another. The second store has a more airy feel. It is one long room with built in shelving stuffed with yarn. A low counter runs most of way up both sides, which are stacked with books and more yarn. Unfortunately, this counter makes it difficult and awkward to get to the yarns to look at them. In addition, the knitting table is also in the way of getting to the yarn. The organization is less obvious as well. They yarn's seem to be grouped by weight, possibly material, but since they're hard to get to, it's hard to tell.

3) Staff - This one is the key. In the first store, the staff is not part of the knitting group. They are working. One staff member is near the group and talking with them, but she has held herself apart from the group. Another staff member is doing other work in the back. In the second store, there is no obvious staff, because any staff members are sitting with the knitting group. It makes it feel as though the customer is interrupting. Additionally, there's the offer to help. Coming from behind the counter, it feels genuine and unhurried. Coming from the social group, it feels as if the offer is just a means to get you out of the store as quickly as possible. I know this is not how the second store's employee meant it, but that's how it feels to the customer.

Unfortunately most yarn stores that I've visited fall into the second category, not the first. While it's nice to see and touch the yarns before purchasing them, visiting a yarn store is not always a pleasant experience, so I'll stick to ordering most of my yarns on line.

Tuesday, February 9, 2010

First Post + A New Skill

I've been saying I'm going to start a blog for over a year now, so it really is time I got off my butt and did so. I originally thought my blog would be about professional and business issues, and there still may be some posts about that in the future, but the ideas in my head right now that want to come out are closer to home, so I'm starting with a brief post about a new skill I've acquired.


2009 was the year I learned to knit. I already knew how to crochet, but wanted to expand my abilities with yarn, so I had my mother show me the basics. Unfortunately, when i told my friends and family I had learned this new skill, they all responded with, "I thought you already knew how to knit." So, apparently, 2009 was the year I lived up to everyone's expectations.

Knitting has turned out to be much easier than I expected. I'm already on my second project and feel my work looks as good as any seasoned knitter. A few things I've learned about knitting:

  • the basic stitches: knit and purl; as well as decreasing techniques (knitting and purling together); I can't wait to add increasing techniques, I'm assuming it involves knitting and purling more than once in a stitch.

  • the basic needle types: straight, circular and double pointed; all with many different sizes.

  • making a mistake is disastrous: in crochet, if you mess up, you take your needle out and rip the stitches out til you reach the mistake, then stick your needle back in and resume crocheting; in knitting, you have to unknit to the point you made the mistake.

  • knitting in the round is tricksy. This is true of crochet as well, but my first attempt at a hat had me creating a moebius strip. Cool to look at, not easy to wear.

  • I don't like bamboo needles. I knit and crochet very tightly, so the bamboo doesn't work for me as my stitches don't slide forward. When I mentioned my dislike of bamboo to my sister, I expected her to agree with me, but instead she told me that her stitches fall off the metal needles, so she likes the bamboo better. I never would have guessed needle material would be a talking point.

Those who know me would be proud to learn that for my first project, a scarf for my husband with a subtle striped look, I followed the instructions exactly as written. This resulted in a rather narrower scarf than I would have liked. For the follow up matching hat, I had to modify the pattern so it would fit him. It's still a little small.


For my current project I found a two color snowflake motif pattern on line and modified it to create a headband pattern. Technically it's not a real snowflake, since it is eight pointed, but I liked it best of all the patterns I found. This headband is for me and matches my new ski jacket. The jury's still out on whether I'll line it with fleece once I'm done knitting.